SpringBoot2 学习笔记01 Sprint基础知识须知
更新记录 20241122:重构系列
1 开篇
学习 SpringBoot 并不需要你太了非常 JAVA,你只需要有一点编程基础就可以了。
那么在正式学习 SpringBoot 之前我们需要先了解下 Spring 的一些基本语法和知识,这些在 SpringBoot 中会很少用到,但你需要知道他们的存在。
- 本章重点:
- 什么是 IOC 和 DI?
Bean的作用是什么?- 如何创建
Bean? Bean的生命周期AOP的使用
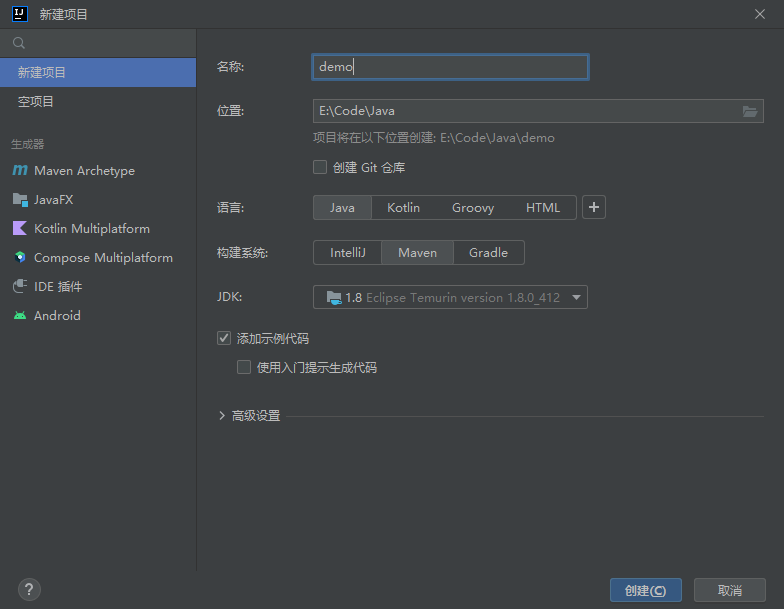
2 创建项目
打开 IDEA,创建项目,修改 Server URL 为 https://start.aliyun.com 否则会无法创建 2.X 项目。
使用上面的新建项目也是可以的
3 pom.xml
打开 pom.xml 文件,添加一些基础依赖。
这里你需要注意 dependencyManagement 的管理当前项目需要下载那些依赖,而 dependencies 是导入哪些依赖。
<?xml version="1.0" encoding="UTF-8"?>
<project xmlns="http://maven.apache.org/POM/4.0.0"
         xmlns:xsi="http://www.w3.org/2001/XMLSchema-instance"
         xsi:schemaLocation="http://maven.apache.org/POM/4.0.0 http://maven.apache.org/xsd/maven-4.0.0.xsd">
    <modelVersion>4.0.0</modelVersion>

    <!-- 组名 -->
    <groupId>org.example</groupId>
    <!-- 项目ID -->
    <artifactId>demo</artifactId>
    <!-- 项目版本 -->
    <version>1.0-SNAPSHOT</version>

    <properties>
        <java.version>1.8</java.version>
        <project.build.sourceEncoding>UTF-8</project.build.sourceEncoding>
        <project.reporting.outputEncoding>UTF-8</project.reporting.outputEncoding>
        <spring-boot.version>2.7.18</spring-boot.version>
        <lombok.version>1.18.30</lombok.version>
    </properties>

    <!-- 管理依赖版本 -->
    <dependencyManagement>
        <dependencies>
            <!-- SpringBoot的依赖配置-->
            <dependency>
                <groupId>org.springframework.boot</groupId>
                <artifactId>spring-boot-dependencies</artifactId>
                <version>${spring-boot.version}</version>
                <type>pom</type>
                <scope>import</scope>
            </dependency>

            <!-- lombok -->
            <dependency>
                <groupId>org.projectlombok</groupId>
                <artifactId>lombok</artifactId>
                <version>${lombok.version}</version>
            </dependency>
        </dependencies>
    </dependencyManagement>

    <!-- 应用依赖 -->
    <dependencies>
        <!-- AOP -->
        <dependency>
            <groupId>org.springframework.boot</groupId>
            <artifactId>spring-boot-starter-aop</artifactId>
        </dependency>

        <!-- Web模块 -->
        <dependency>
            <groupId>org.springframework.boot</groupId>
            <artifactId>spring-boot-starter-web</artifactId>
        </dependency>

        <!-- lombok -->
        <dependency>
            <groupId>org.projectlombok</groupId>
            <artifactId>lombok</artifactId>
        </dependency>
    </dependencies>

    <build>
        <plugins>
            <plugin>
                <groupId>org.springframework.boot</groupId>
                <artifactId>spring-boot-maven-plugin</artifactId>
            </plugin>
        </plugins>
    </build>
</project>
然后点击如图所示,下载依赖

4 了解 IOC 和 DI
4.1 例子
- IOC 控制反转
- 控制反转是什么?
- 通过描述(XML 或注解)获取特定对象的方式。
- DI 依赖注入
- 在
service中不通过new方式获取Dao对象,而且通过beans。
- 在
我们希望在 Main 文件上通过 Bean 调用 UserDao 和 UserService 方法。
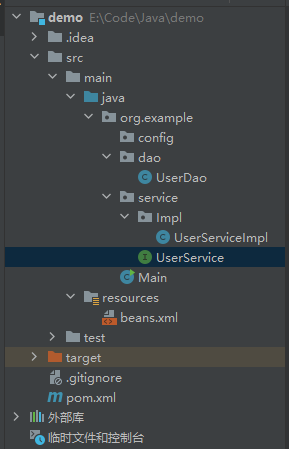
dao/UserDao.java:创建一个 DAO 方法
public class UserDao {
    public void show() {
        System.out.println("UserDao");
    }
}
service/UserService.java
public interface UserService {
    public void show();
}service/Impl/UserServiceImpl.java:私有属性 userDao 是通过 beans.xml 配置的关系中传递过来的,我们就可以直接调用 userDao.show() 了。
Setter 方法的作用是接收从 beans 传递过来的 userDao 对象。
public class UserServiceImpl implements UserService {
    // 这里的 userDao 是对应 beans.xml 的 name 属性
    private UserDao userDao;

    @Override
    public void show() {
        userDao.show();
        System.out.println("UserServiceImpl");
    }

    // 将 UserDao 传递过来
    public void setUserDao(UserDao userDao) {
        this.userDao = userDao;
    }
}beans.xml:给 Bean 绑定 UserDao 和 UserService 方法
<?xml version="1.0" encoding="UTF-8"?>
<beans xmlns:xsi="http://www.w3.org/2001/XMLSchema-instance"
       xmlns="http://www.springframework.org/schema/beans"
       xsi:schemaLocation="http://www.springframework.org/schema/beans http://www.springframework.org/schema/beans/spring-beans.xsd">

    <bean id="userDao" class="org.example.dao.UserDao"/>
    <bean id="userService" class="org.example.service.Impl.UserServiceImpl">
        <!-- 配置server与dao的关系 -->
        <property name="userDao" ref="userDao"/>
    </bean>
</beans>
最后我们导入 beans.xml,就可以通过 Bean 去调用方法了。
@SpringBootApplication
public class Main {
    public static void main(String[] args) {
        // SpringApplication.run(DemoApplication.class, args);

        // 获取IOC容器
        ClassPathXmlApplicationContext ctx = new ClassPathXmlApplicationContext("beans.xml");

        // 获取bean
        // UserService userService = ctx.getBean(UserService.class);
        UserService userService = (UserService) ctx.getBean("userService");
        userService.show();

        // 关闭IOC容器
        ctx.close();
    }
}
4.2 单例
- scope
- 默认:
singleton - 非单例:
prototype
- 默认:
默认情况下是单例,当创建了 2 个 IOC 容器的时候,操作的对象都不一样。
非单例:就是在操作同一个对象。
<bean bean id="userService" class="org.example.service.Impl.UserServiceImpl" scope="singleton"/>4.3 别名
name: 为 bean 指定别名,别名可以有多个,使用逗号,分号,空格进行分隔
<bean id="userService" name="service service4 bookEbi" class="org.example.service.Impl.UserServiceImpl"/>5 Bean
Bean 是由 Spring 容器管理的对象,如果没有 Bean 我们将无法调用方法。
5.1 生命周期
有两种方式实现
- 第一种是通过
xml
dao/UserDao.java
public class UserDao {
    // 表示bean初始化对应的操作
    public void init() {
        System.out.println("init...");
    }

    // 表示bean销毁前对应的操作
    public void destory() {
        System.out.println("destory...");
    }
}
在 XML 中绑定方法
<bean id="userDao" class="org.example.dao.UserDao" init-method="init" destroy-method="destory"/>- 第二种通过
异常
public class UserDao implements InitializingBean, DisposableBean {
    public void destroy() throws Exception {
        System.out.println("service destroy");
    }

    public void afterPropertiesSet() throws Exception {
        System.out.println("service init");
    }
}
5.2 自动装配
autowire="byType":通过类型自动匹配,这样及不需要配置关系了。
<bean id="userService" class="org.example.service.Impl.UserServiceImpl" autowire="byType">
    <!-- 配置server与dao的关系 -->
    <!-- <property name="userDao" ref="userDao"/> -->
</bean>
5.3 构造器注入
通过 constructor-arg 传递数值
public class UserDao {
    private String name;
    private int age;

    public UserDao(String name, int age) {
        this.name = name;
        this.age = age;
    }

    public void save() {
        System.out.println("book dao save ..." + name + "," + age);
    }
}
XML
<bean id="userDao" class="org.example.dao.UserDao">
    <constructor-arg name="name" value="mysql"/>
    <constructor-arg name="age" value="80"/>
</bean>
5.4 集合注入
了解下就可以了,平时用不到的
package org.example.dao;

import org.springframework.beans.factory.DisposableBean;
import org.springframework.beans.factory.InitializingBean;

import java.util.*;

public class UserDao {
    private int[] array;

    private List<String> list;

    private Set<String> set;

    private Map<String, String> map;

    private Properties properties;


    public void setArray(int[] array) {
        this.array = array;
    }

    public void setList(List<String> list) {
        this.list = list;
    }

    public void setSet(Set<String> set) {
        this.set = set;
    }

    public void setMap(Map<String, String> map) {
        this.map = map;
    }

    public void setProperties(Properties properties) {
        this.properties = properties;
    }


    public void save() {
        System.out.println("book dao save ...");

        System.out.println("遍历数组:" + Arrays.toString(array));

        System.out.println("遍历List" + list);

        System.out.println("遍历Set" + set);

        System.out.println("遍历Map" + map);

        System.out.println("遍历Properties" + properties);
    }
}<?xml version="1.0" encoding="UTF-8"?>
<beans xmlns:xsi="http://www.w3.org/2001/XMLSchema-instance"
xmlns="http://www.springframework.org/schema/beans"
xsi:schemaLocation="http://www.springframework.org/schema/beans http://www.springframework.org/schema/beans/spring-beans.xsd">
<bean id="userDao" class="org.example.dao.UserDao">
<property name="array">
<array>
<value>100</value>
<value>200</value>
<value>300</value>
</array>
</property>
<!--list集合注入-->
<property name="list">
<list>
<value>itcast</value>
<value>itheima</value>
<value>boxuegu</value>
<value>chuanzhihui</value>
</list>
</property>
<!--set集合注入-->
<property name="set">
<set>
<value>itcast</value>
<value>itheima</value>
<value>boxuegu</value>
<value>boxuegu</value>
</set>
</property>
<!--map集合注入-->
<property name="map">
<map>
<entry key="country" value="china"/>
<entry key="province" value="henan"/>
<entry key="city" value="kaifeng"/>
</map>
</property>
<!--Properties注入-->
<property name="properties">
<props>
<prop key="country">china</prop>
<prop key="province">henan</prop>
<prop key="city">kaifeng</prop>
</props>
</property>
</bean>
<bean id="userService" class="org.example.service.Impl.UserServiceImpl">
<!-- 配置server与dao的关系 -->
<property name="userDao" ref="userDao"/>
</bean>
</beans>6 AOP
AOP 是在不改原有代码的前提下对其进行增强,这是一个非常重要的功能,在很多地方我们可能会用到。
6.1 简单案例
新建文件 config/MyConfig.java
@ComponentScan("org.example")    // 扫描包
@Configuration(proxyBeanMethods = false) // 声明配置类, 默认false非单例
@EnableAspectJAutoProxy // 开启注解开发AOP功能
public class MyConfig {
}
然后创建文件 aop/MyAdvice.java
匹配 org.example.dao 该目录下所有文件的 update() 方法
@Component  // 通知类必须配置成Spring管理的bean
@Aspect // 设置当前类为切面类类
public class MyAdvice {
    // 定义切入点
    @Pointcut("execution(void org.example.dao.*.update())")
    private void pt() {
    }

    // 前置通知
    @Before("pt()")
    public void before() {
        System.out.println("before advice ...");
    }

    @After("pt()")
    public void after() {
        System.out.println("after advice ...");
    }
}
UserDao
@Component
public class UserDao {
    public void update() {
        System.out.println("UserDao update ...");
    }
    public int select() {
        System.out.println("UserDao select is running ...");

        // int i = 1 / 0;
        return 100;
    }
    public String findName(int id, String password) {
        System.out.println("id:" + id);
//        if (true) {
//            throw new NullPointerException();
//        }
        return "findName";
    }
}
6.2 通配符
切入点的通配符
*:通配符,这个就不细说的..:简化包名与参数的书写
execution(public User com..UserService.findById(..))匹配 com 包下的任意包中的 UserService 类或接口中所有名称为 findById 的方法
+:专用于匹配子类类型
execution(* *..*Service+.*(..))*Service+,表示所有以 Service 结尾的接口的子类。
execution(void com.itheima.dao.BookDao.update())
匹配接口,能匹配到
execution(void com.itheima.dao.impl.BookDaoImpl.update())
匹配实现类,能匹配到
execution(* com.itheima.dao.impl.BookDaoImpl.update())
返回值任意,能匹配到
execution(* com.itheima.dao.impl.BookDaoImpl.update(*))
返回值任意,但是update方法必须要有一个参数,无法匹配,要想匹配需要在update接口和实现类添加参数
execution(void com.*.*.*.*.update())
返回值为void,com包下的任意包三层包下的任意类的update方法,匹配到的是实现类,能匹配
execution(void com.*.*.*.update())
返回值为void,com包下的任意两层包下的任意类的update方法,匹配到的是接口,能匹配
execution(void *..update())
返回值为void,方法名是update的任意包下的任意类,能匹配
execution(* *..*(..))
匹配项目中任意类的任意方法,能匹配,但是不建议使用这种方式,影响范围广
execution(* *..u*(..))
匹配项目中任意包任意类下只要以u开头的方法,update方法能满足,能匹配
execution(* *..*e(..))
匹配项目中任意包任意类下只要以e结尾的方法,update和save方法能满足,能匹配
execution(void com..*())
返回值为void,com包下的任意包任意类任意方法,能匹配,*代表的是方法
execution(* com.itheima.*.*Service.find*(..))
将项目中所有业务层方法的以find开头的方法匹配
execution(* com.itheima.*.*Service.save*(..))
将项目中所有业务层方法的以save开头的方法匹配
6.3 通知类型
- 前置通知:方法执行前
- 后置通知:方法执行后
- 环绕通知
- 返回后通知
- 抛出异常后通知
前置和后置刚刚案例说了,这里就不赘述了。
- 环绕通知:不存在返回值
@Around("pt()")
public void around(ProceedingJoinPoint pjp) throws Throwable {
    System.out.println("around before advice ...");
    // 表示对原始操作的调用
    pjp.proceed();
    System.out.println("around after advice ...");
}- 环绕通知:存在返回值
@Around("pt()")
public Object around(ProceedingJoinPoint pjp) throws Throwable {
    System.out.println("around before advice ...");
    // 表示对原始操作的调用
    Object ret = pjp.proceed();
    System.out.println("around after advice ...");
    return ret;
}- 返回后通知 + 抛出异常后通知
// 获取返回值
@AfterReturning(value = "pt()", returning = "ret")
public void afterReturning(Object ret) {
    System.out.println("afterReturning advice ..." + ret);
}

// 获取报错信息
@AfterThrowing(value = "pt()", throwing = "t")
public void afterThrowing(Throwable t) {
    System.out.println("afterThrowing advice ..." + t);
}
6.4 事务管理
@Transactional:事务注解,当方法执行完成后不报错才会通过。
例如:下面我们执行 outMoney 没有出错成功添加 💰,但在执行 inMoney 时报错导致程序中断,假如没有 @Transactional 则我们就 只添加 💰,并没有减少。
@Transactional:可以帮我们在报错时就回滚数据。
@Service
public class AccountServiceImpl implements AccountService {
    @Autowired
    private AccountDao accountDao;

    @Transactional
    public void transfer(String out, String in, Double money) {
        accountDao.outMoney(out, money);    // 添加money
        accountDao.inMoney(in, money);    // 减少money
    }
}